For the most part, assembling a Cabinotch Base Piecut Corner cabinet is just like assembling any other Cabinotch Full Access Base Cabinet, with the exception that this cabinet has a two piece top and bottom.
The reason we choose to do this is it allows the tops and bottoms to be edgebanded on our automatic edgebander, providing a much better looking glue line, and superior glue adhesion. The L-Shape front notch of a one-piece unit requires hand edgebanding.
First, this is what you are attempting to assemble.
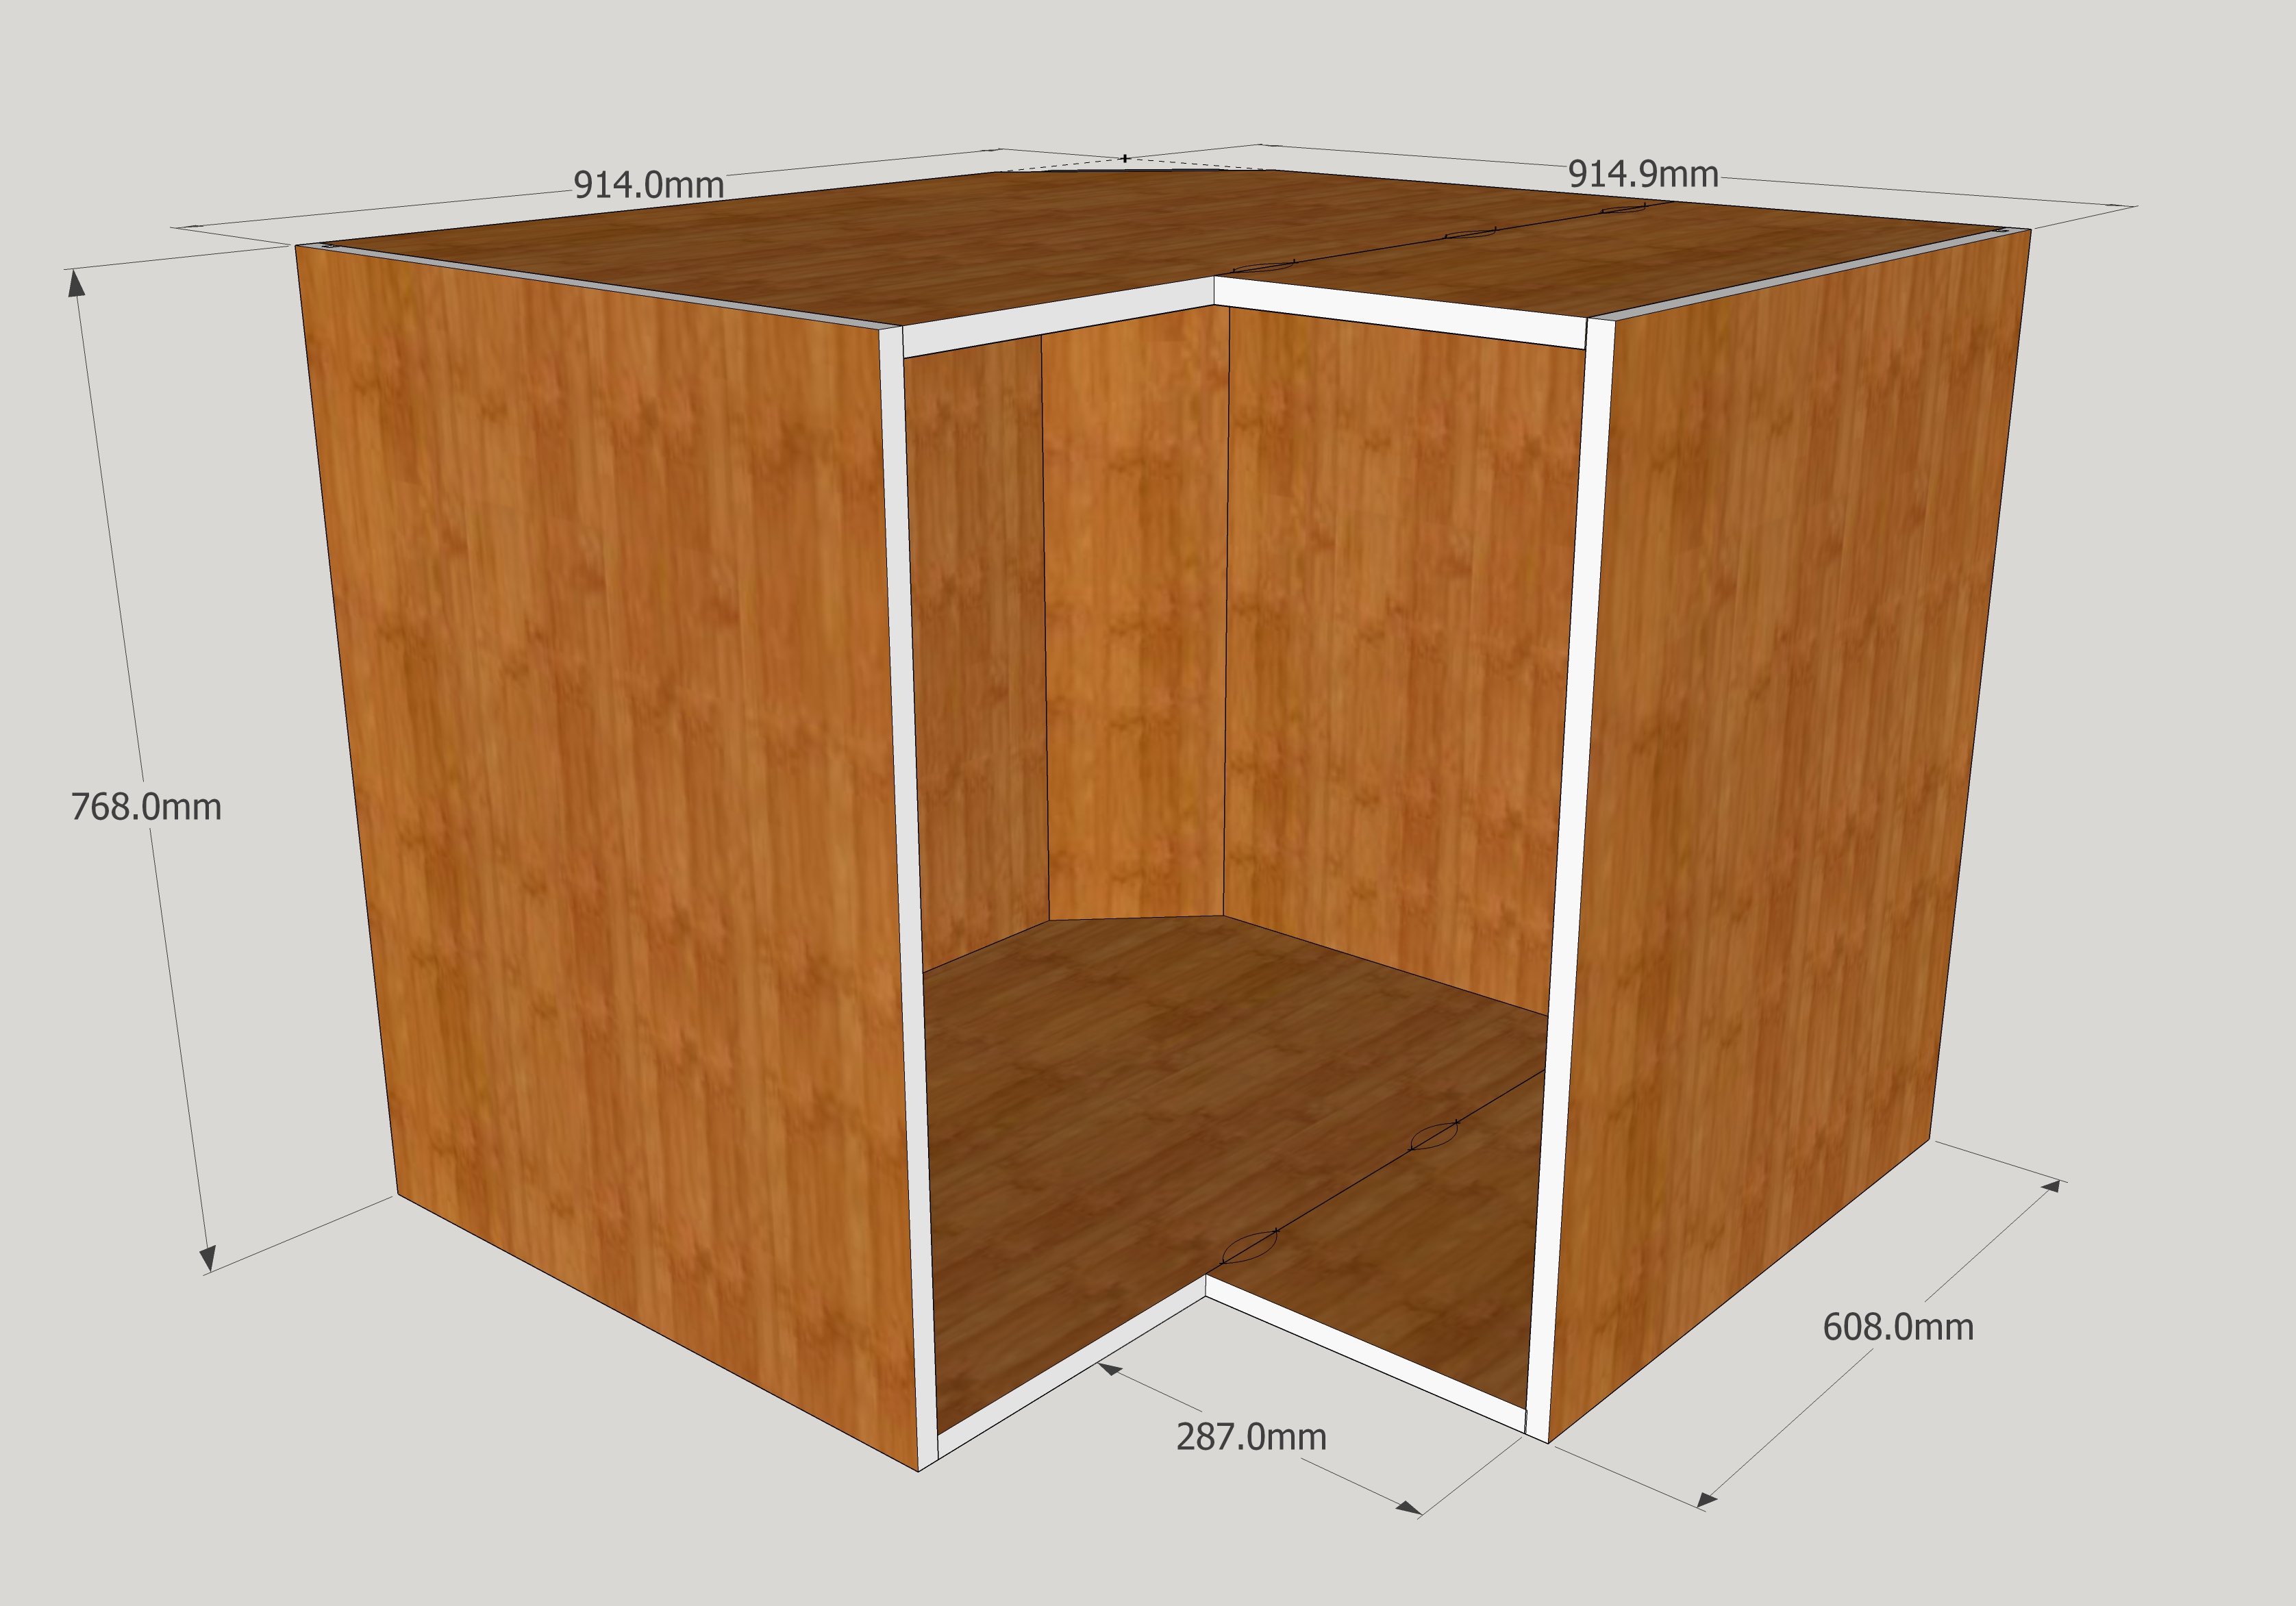
There are two pieces that make the top and two pieces that make the bottom, and they are put together by adding a PUR glue to the female Lamello, and then snapping the two parts together.
For the cabinet itself, it should not be a problem to go ahead and assemble the cabinet even though this glue is not dry, but once you are done assembling the cabinet, you should let the glue set for a couple hours before stressing the joint you added glue to.
To help you with orienting the parts, the following image should provide you with the layout, and how all the parts go together.
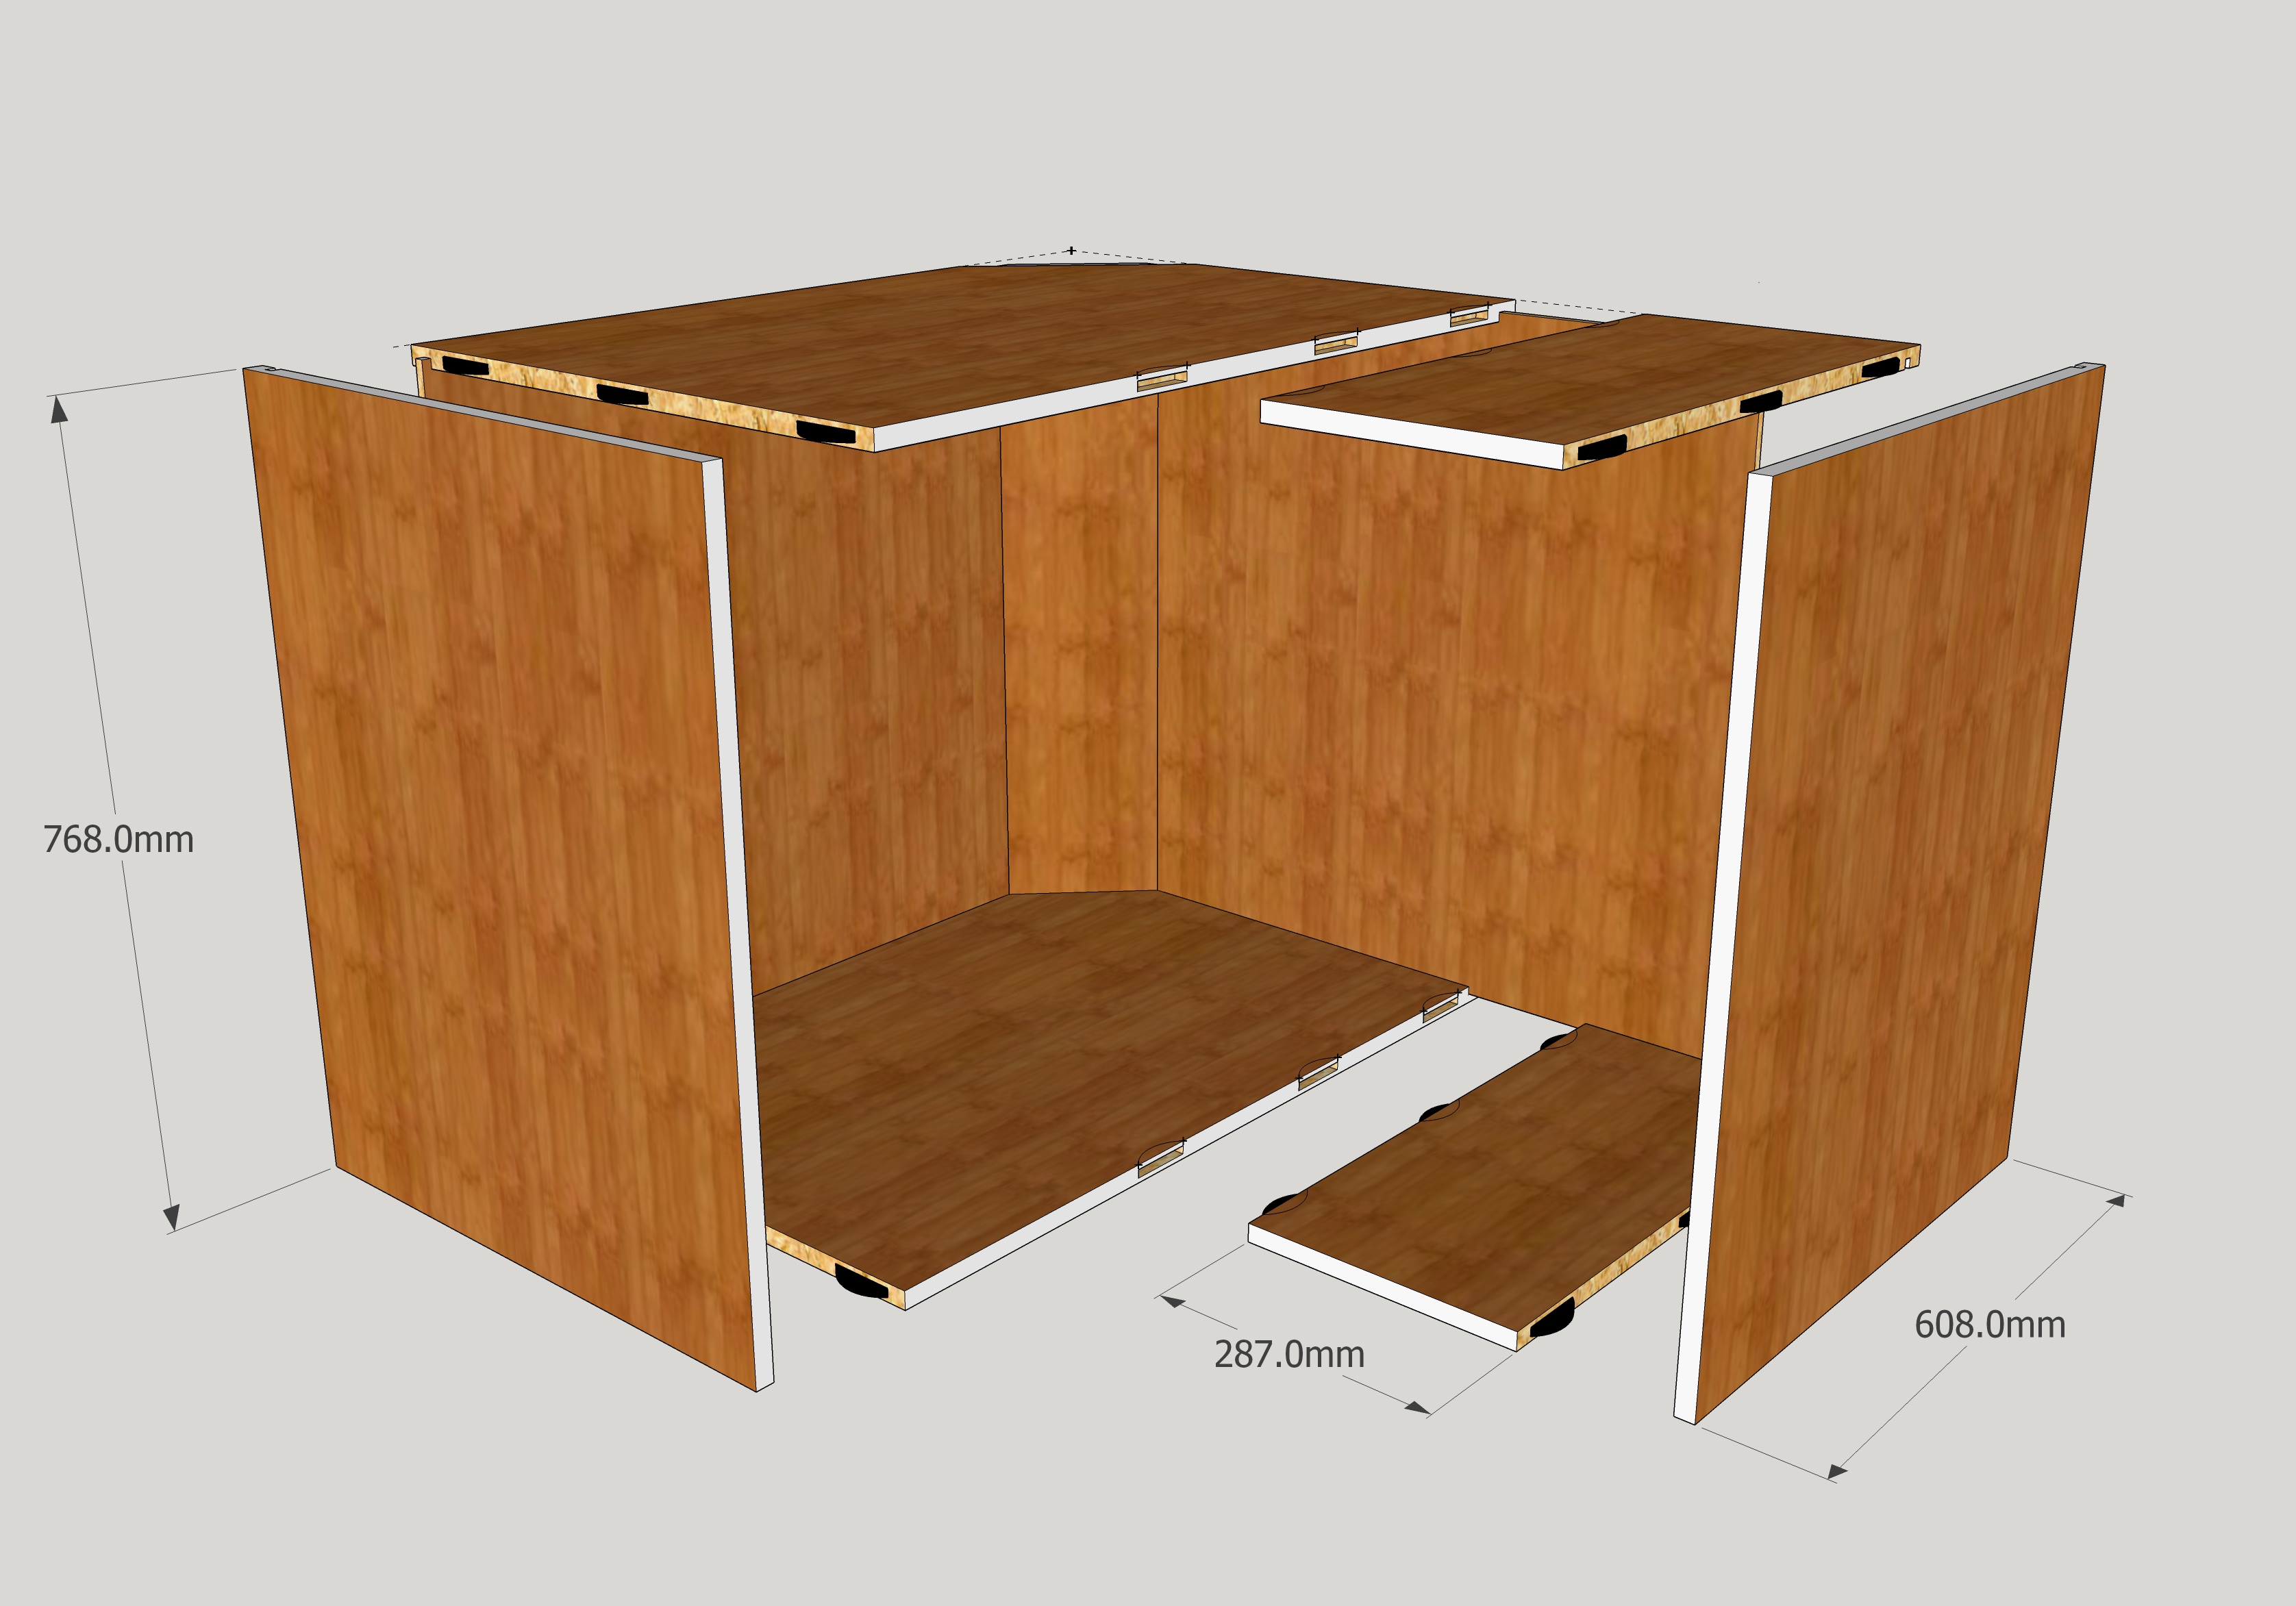
More often than not, these cabinets end up with Lazy Susan units installed in them, but if you choose to have adjustable shelves, you will need to glue the joint between the two parts that make up the L-Shaped adjustable shelf with PUR glue, and let the glue setup completely before installing the adjustable shelves in the cabinet.
Here is another view that might help. The X-Ray view lets you see through the parts so you can see the machining.